Friday, September 28, 2012

DIY - delicate crochet friendship bracelet tutorial

i love making delicate layering bracelets!  
recently i devised a little bracelet with a tie closure, made from a combination of cotton thread, silver beads, and a simple crochet chain.  
here's the little tutorial for it - enjoy!

(and if you're less inclined to make your own, contact me via my etsy shop
or my contact page for a custom bracelet of your own, made by me!)

(disclaimer)
pattern is for personal use only,
not to be reproduced for sale nor to make items for sale.
© The Nerdy Penguin. All rights reserved.


 (materials)
embroidery floss*
steel crochet hook, size 2*
small silver beads (7)
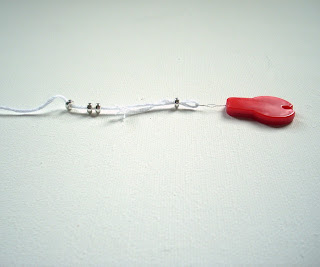
threader
scissors


(skills)
crochet chain

*you can substitute a thicker/thinner thread if you like,
just make sure to use a crochet hook that will accommodate it!

(1)
string the seven beads onto the thread.  if necessary, use your threader to get the beads onto the thread.


(2)
make a slip knot, leaving a long tail (about 8-10 inches).


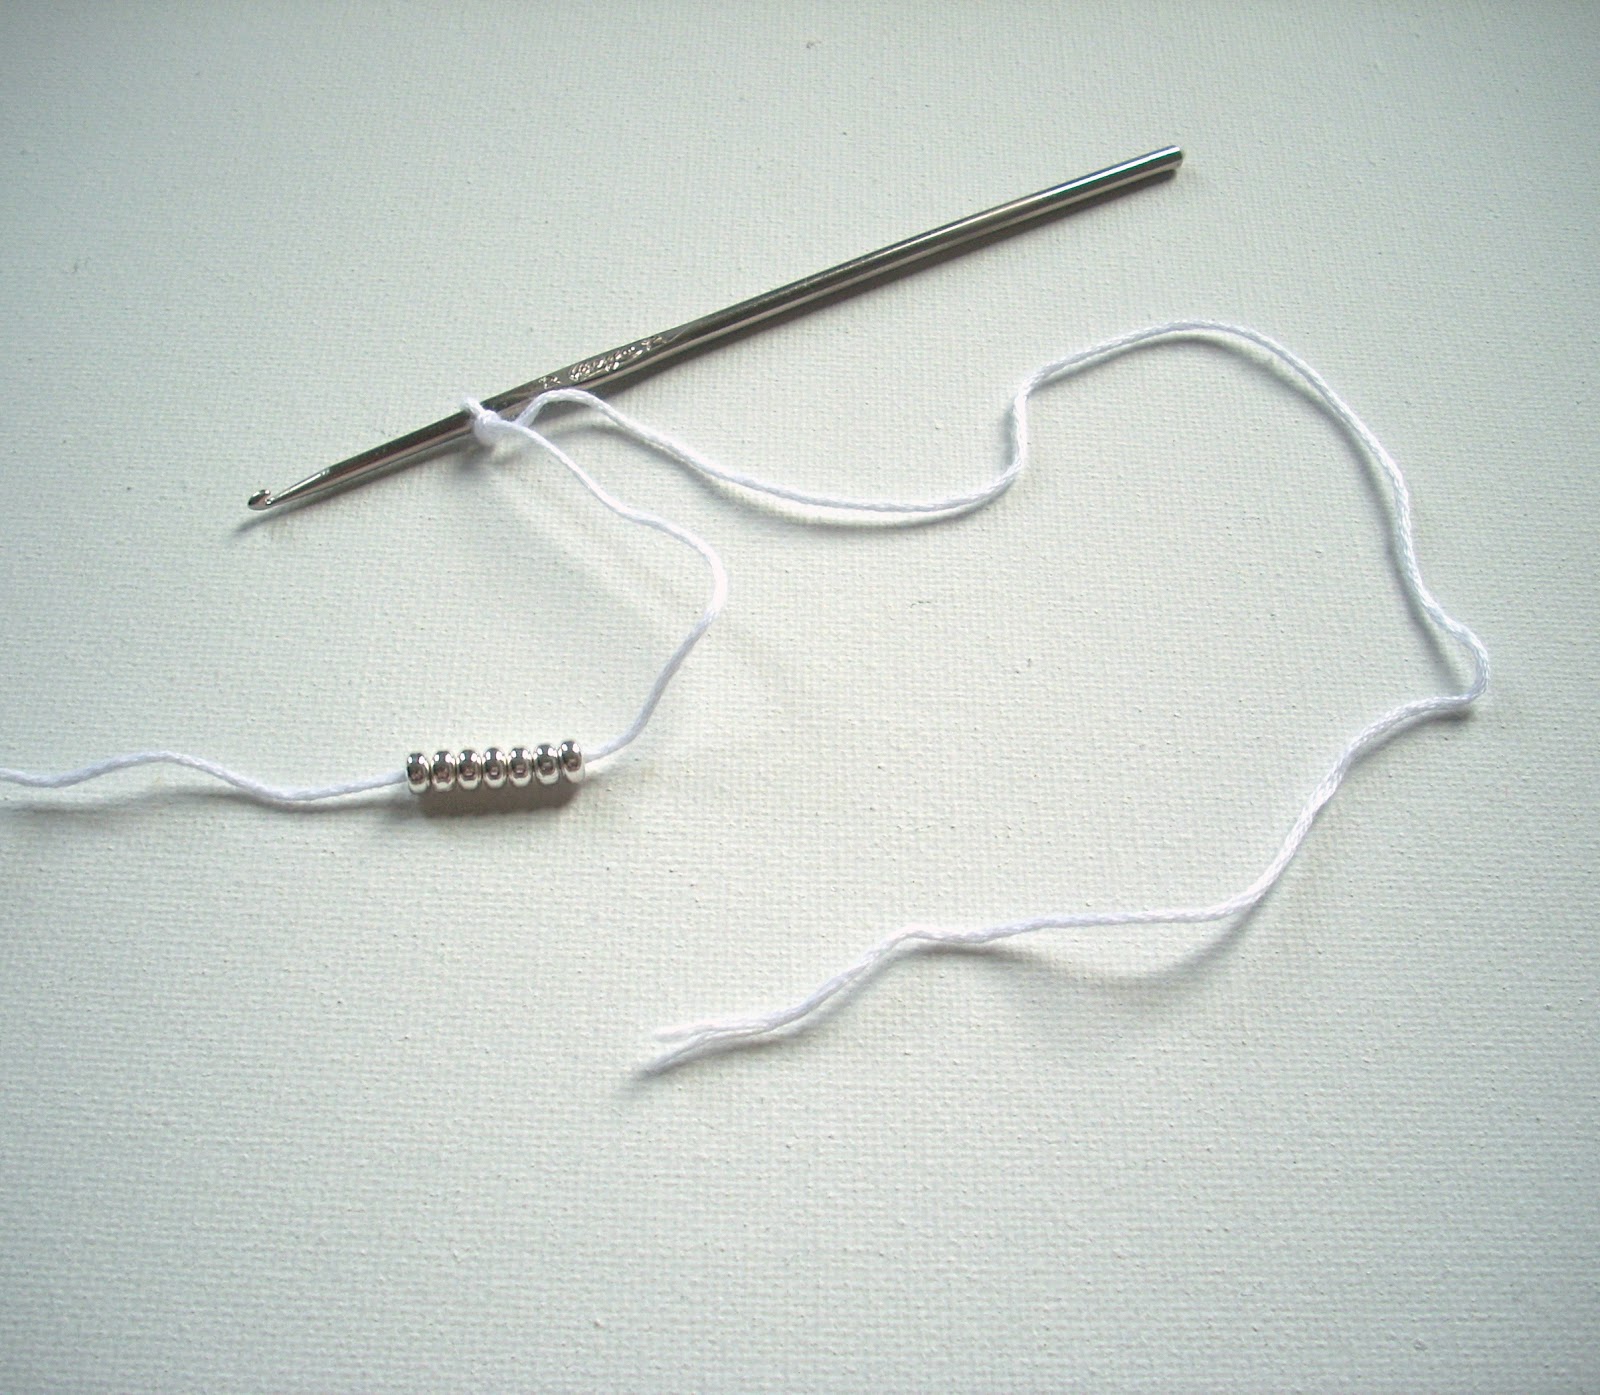
slide 1 bead up to your hook...


...then chain.


repeat for the remaining six beads.
try to maintain a relatively loose tension.


(3)
measure out another 8-10 inches of thread after the crochet chains, and cut the thread.
you should now have your crochet chain sandwiched by two equal thread lengths of 8-10 inches.


(4)
tie a simple knot on one of the lengths of thread (this is to prevent fraying).
where this knot is placed depends on your wrist size, and how much extra thread you would like to be able to tie your bracelet on your wrist.
my wrist size is 6 inches, so a 10-inch bracelet is what I usually go for when i have a bracelet with a tie closure.


(5)
pull on the knot tightly and cut the thread about a centimeter or so away from the knot.


(6)
repeat on the other side.
make sure the knots are of equal distance away from the crocheted chains.


and there you have it!  simply tie the bracelet onto your wrist.
you can wear this bracelet alone, or layered with other bracelets.
personally i like the layered look :)
enjoy! --danica


Saturday, July 7, 2012

the nerdy penguin tutorial: paper box (for jewelry, bobby pins, business cards...anything you want!)

in my last post, i promised a tutorial for my next future post.  here it is!  

after learning how to make them, i have used these little boxes for so many things - to store bobby pins and little beads, as well as packaging gifts in them.  i even make them out of heavy cardstock and use them as cute packaging for some of my jewelry orders, complete with my shop stamp and a bit of washi tape :)

and i know that i said "little boxes", but you can actually make these boxes as big as you like, as long as the paper you start out with is a square!

so, without further ado...


adapted from

difficulty
easy-medium

materials:
a square of paper or cardstock

[if you want to make a lid] a square of paper 1/2 inch larger than your first square

some patience for the trickier parts!

clear tape or glue


Step 1
take your square of paper.  
if your square is colored on one side, place the color face down so that the white part of the paper is showing. 


Step 2
fold the square in half.  
unfold.
then fold the square in half again, using the side of the square you did not fold in half before.  
the square should look like this, segmented into four sections.

[tip] for best results, crease when you fold. 
for more info on creasing, check out this video!


Step 3
take each point of the square and fold to the center of the square.  the color of your square should now be showing, if you used paper that is colored on one side.


Step 4
fold one flat side of the square to the center.
repeat on the other side.
you should now have a rectangle, divided down the middle.


Step 5
fold the short bottom of your rectangle to the center of the rectangle.
repeat on the other side.
you should now have a square, divided in the middle.


Step 6
unfold to here.
what you have just folded are guidelines that will create the actual box.


Step 7
this is the tricky part - bringing your box from 2D paper to a 3D structure!
on the top right side of your unfolded square, find a little square outlined by your previous folds.  i have circled that little square in red below.


to create the first corner of your box, you will take the two corners of the little square (indicated by the diagram below) and fold them so that they meet at the back.  
it might be hard to see, but there is a diagonal fold going through the square that will act as a guideline when creating this fold.


the finished fold should look something like this.


then, repeat on the other side to create your second corner.


Step 8
take the top of the square above the two corners you just folded, and fold to the center of the square.
this will create the first side of your box. 
(only 1 more to go - the remaining 2 sides will automatically form as you create your second side.)
the new 3D corners, as well as the guidelines created by your previous folds, will help guide your fold.


the finished fold should look like this.


Step 9
repeat steps 7 and 8 on the other side!


and voila!
you have your new box :)
to make the box more secure, you can put a piece of tape or dab a bit of glue where those four corners meet in the center of the box.
but, this is not necessary.

to make your lid, create another box out of the 1/2 larger square of paper.
after much experimentation, i found that having the paper for the lid start out at 1/2 inch bigger made a perfectly snug fit for the box!


if you make the lid, it will be flush with the smaller box, 
as you can see below.


and that's it!
if you have any questions or think this tutorial needs more clarification, leave a comment below!
and show me some boxes that you've made, i'd love to see them!

cheers,
danica

Saturday, August 27, 2011

Tutorial: DIY Simple Crochet Bracelets

crochet bracelet pattern


This is my first attempt at a pattern! This pattern in particular is one that I've been wanting to share for a while.  They're really easy to make, and you can whip up a few for yourself (and maybe some friends) in an evening, or even less than that!

In any case, this being my first pattern, feel free to let me know if there are any clarifications that need to be made!

What you'll need:
- Small amount of worsted cotton yarn.  You can also use any other yarn that feels nice.  I prefer the feel and weight of natural yarns, although you can certainly make these bracelets with acrylic yarn.
- Size G crochet hook
- Yarn needle
- Scissors

Skills required:
Ch = chain
Sl st = slip stitch
Sc = single crochet

Steps:

1. Ch 25.


2. Sl st to create a loop.  Make sure your chain isn't twisted!


3. Ch 1 (counts as first sc). 2nd ch from hook, sc 24 (25 total).  Sl st at first sc to close the bracelet.


4. Bind off and weave in ends.

5. Say hello to your new bracelet!  Make more to stack on your wrist, or give to friends!


© The Nerdy Penguin.  All rights reserved.  Pattern is for personal use only.  It is not to be reproduced for sale, nor to make items for sale.  Thank you!